Awesome ‘N’ Amazing
Project to build a FedEx Dodge Sprinter
from a Busch Mercedes Sprinter
Creating a FedEx Dodge Sprinter by Peter Wisniewski
It all started when I decided to buy a pair of Busch N scale Mercedes Sprinter models for my friend's layout. Specifically, the ones I found painted for FedEx and DHL. While they are models of a German prototype, these vehicles are also widely used in U.S., either as a Mercedes or re-badged as Dodges and Freightliners. The same goes for the FedEx and DHL liveries - both are often seen in the U.S.
Well, I also wanted to illuminate the taillights and headlights. This task was made easier by the fact that Busch has sold these vehicles with built-in illumination. The illumination consisted of a 12-volt light bulb and a plastic light conduit which directed the light to the taillights and headlights. The models I bought were sold as non-illuminated models, and while they are lacking the light bulb, they still retain the light conduit.
However, I did not like the idea of just installing an old-fashioned light bulb. I have pretty much converted to using LEDs. I also didn't like the idea of just installing a single large white LED as it would be somewhat difficult to shield it to prevent the light from being visible through the windows and inside the wheel wells. Instead, I decided to install 4 tiny SMD LEDs, two red ones for the taillights and two white ones for the headlights.
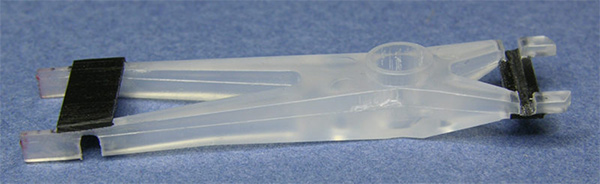
1. I wanted to retain the structural shape of the light conduit to make its installation easier. So, I glued a couple of pieces of 0.015" black styrene in the spots where I was planning to install the LEDs. Then using a cutoff wheel in a Dremel tool, I ground out areas where the LEDs will be installed. The black styrene allows the light conduit to retain its shape even after part of it is ground out.
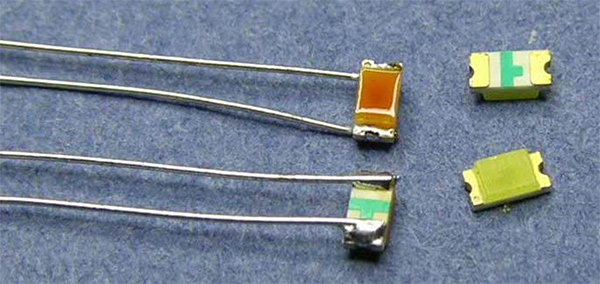
2. I then soldered very fine tinned bare wires to the LEDs. I used the SMD 0603 size LEDs. Pictured are the white LEDs. I also used my custom mix of clear amber and clear red Tamiya acrylic paint to tint the LEDs to make those cool white (bluish) LEDs look more like warm white incandescent lights.
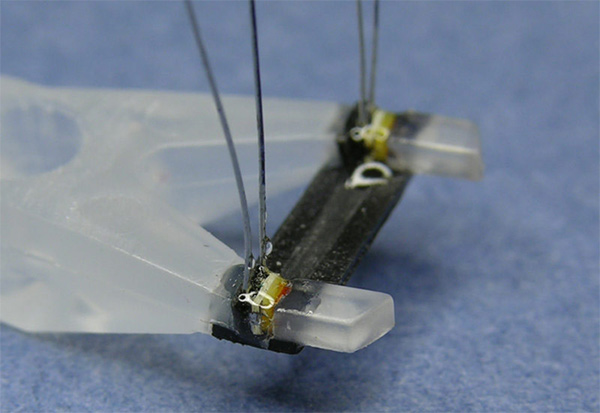
3. Next I glued the LEDs into the openings in the light conduit using a 5-minute epoxy glue. At the same time, I also glued a piece of black styrene behind each LED to prevent the light from back feeding into the center section of the light conduit. That was done to make sure no stray light would be visible inside the model.
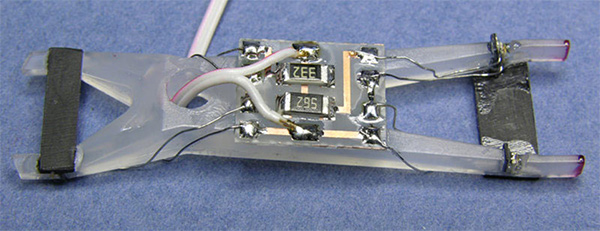
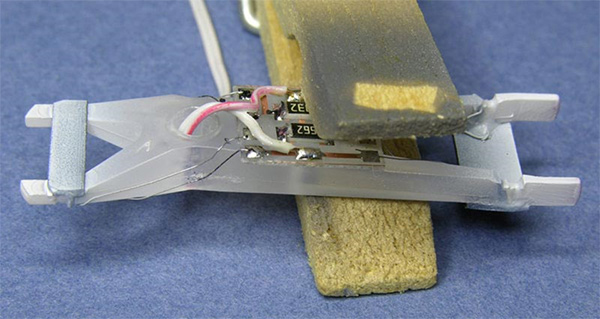
4. I etched a small circuit board which makes the wiring of the LEDs and resistors very easy and neat. That circuit board with current-limiting resistors was glued to the light conduit and the LED wires were then soldered to the board, along with the wires which will supply power to the model. The two front and two rear LEDs were wired in series and each pair has its own current limiting resistor. That made it easy to separately adjust the brightness of the front and rear lights (as the taillights should be much dimmer than the headlights).
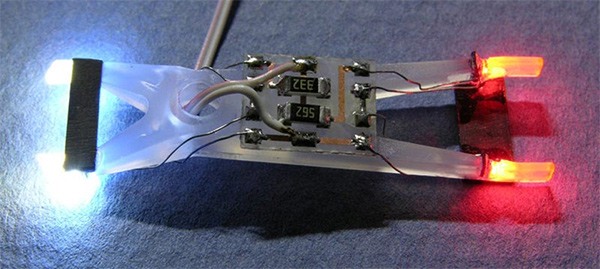
5. Next, I tested the LEDs. Then I covered the tips of the light conduit with liquid masking agent to prepare it for the next steps.
6. Next step was to airbrush the tips of the light conduit white to maximize the light reflection.
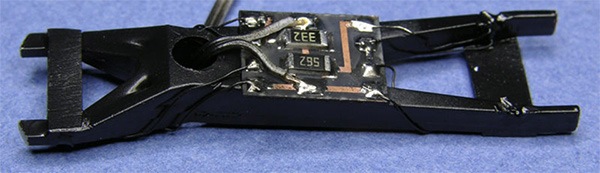
7. Last step in preparing the light conduit was to airbrush everything except the circuit board with black paint. This prevented any light from being visible anywhere other than at the ends of the conduit. After each paint application I hooked up the power to check for light leaks. I had to apply a few layers of black paint to stop all of the light leaks.
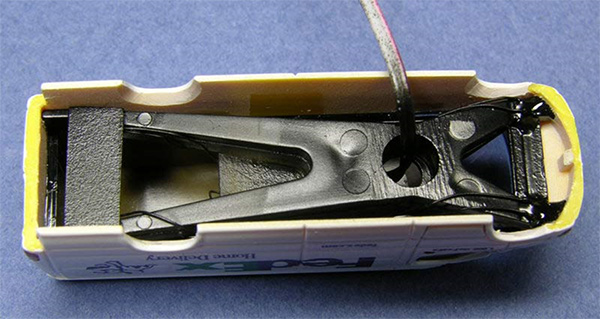
8. Then I installed the entire assembly in the shell of the model and placed dabs of epoxy to affix the conduit in place.
That took care of lighting the model. But since I already had the model apart, I thought it would be fun to repaint it. I really like the FedEx Home Delivery paint scheme with a picture of a cute puppy carrying a package. So the project just got a bit more complicated, which meant that I had to design and print a set of custom decals.
I found plenty of online photos of Dodge Sprinters in the FedEx Home Delivery paint scheme, but then I got even luckier: I also found vector-based artwork of the entire logo! I was originally going to trace the logo from one of the photos, but this find saved me several hours of work!

9. I designed the decal artwork in Corel Draw. In order to properly size my decals I placed the model (on its side, front and rear) on a scanner, and I scanned it at 600 dpi. That resulted in bitmaps which very accurately represented the true size of the model. I imported the scanned bitmaps into my drawing (onto a separate layer which I then locked). Then I took the FedEx artwork and adjusted it to the proper size simply by placing it over the scanned images, and manipulating it until it was the correct size.
Then, since these models are of Mercedes Sprinters and I wanted to model the Dodge version, I drew a Dodge-style grille to be applied over the filed down Mercedes grille on the model. I also created a black decal to simulate the vent on the hood under the windshield. Here is a low-res image of the artwork. The colors are weird because they were optimized for my Alps printer. The actual printed decal has the correct colors.
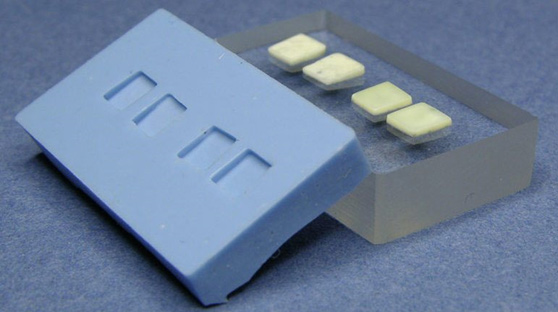
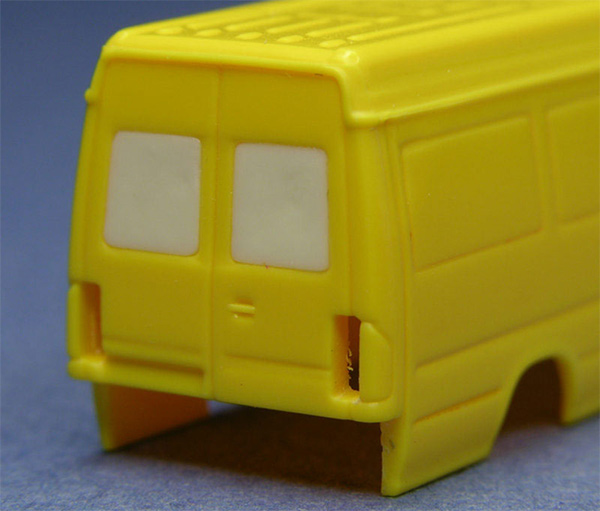
10. In the online photos, I noticed that the real FedEx Sprinters have blanked out windows in the rear doors (while the model has "glass" windows). To properly represent the prototype I had to blank out the windows on the model. Since I'm planning on building more of these vehicles, I decided to make master blank pieces, and then resin-cast duplicates. To make the master blanks, I covered the window openings from the inside with piece of masking tape. Then I applied some mold release agent to the window openings, and I filled them with casting resin to be perfectly flush with the body. Once hardened, I popped the resin pieces out and sanded the outside surface to be flat. Then I glued them to a piece of acrylic sheet, and made a RTV mold from those masters.
11. Next I cast several pairs and installed them in the model.
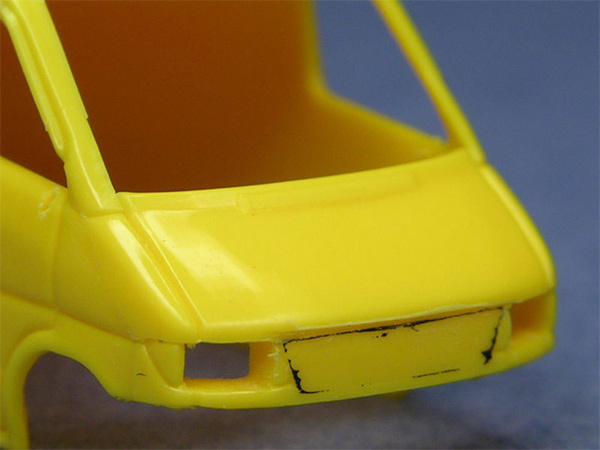
12. At this time I also filed down the Mercedes grille so the Dodge grille decal could be applied after painting.

13. I also discovered that the axles had too much sideways play, so I glued pieces of 0.015" styrene to the wheel openings to restrict their sideways movement.
Next I airbrushed the body with few coats of Tamiya Fine White Primer (decanted from a spray can). The yellow body needed few coats of primer to cover the yellow color. Then I airbrushed a couple of coats of white Acupaint. It dries semi-gloss: a perfect finish for applying decals. I applied the decals and airbrushed the model with semi-gloss Acupaint clear. I also hand-brushed black paint onto the door handles. The last thing painted was the front turn signals and the taillights. Initially I painted them with silver paint, and then applied clear amber and clear red paint to simulate the colored lenses. I also painted the wheel centers using a silver paint pen, and I re-assembled the model.
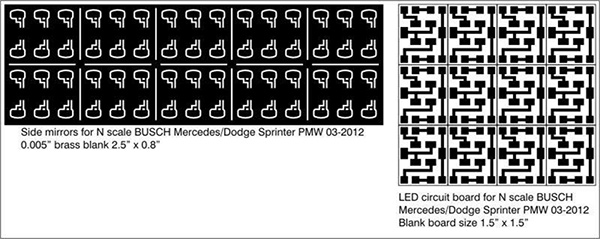
14. A couple of extra details I added were side-mirrors and the antenna over the windshield. The mirrors were photo-etched from 0.005" brass. Here is the artwork for the mirrors and for the LED circuit boards shown in step 4.
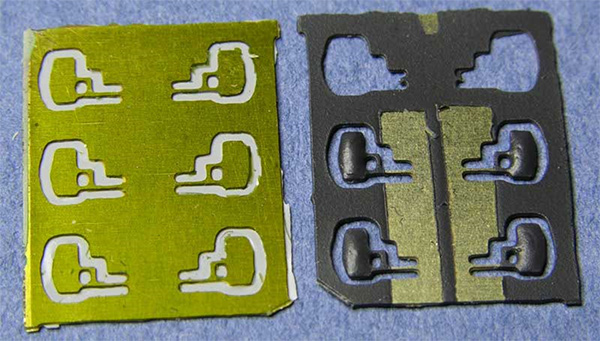
15. Here are the actual mirrors (unpainted and painted). Before painting them I applied solder to the backs to give them a thicker, slightly dome-shaped look. The other side of the mirrors is flat and painted silver.
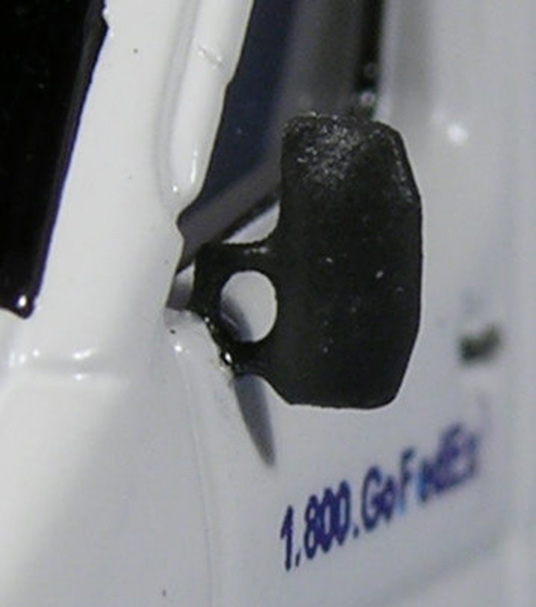
16. Here is a close-up of the installed mirror. To me this small detail really adds to the realism of the model.
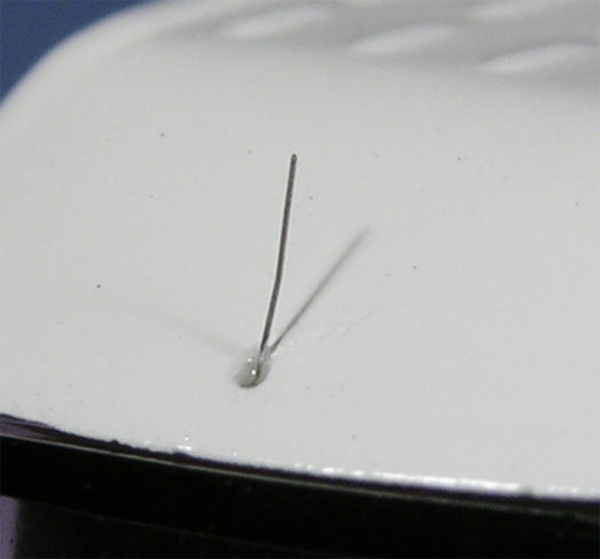
17. Here is a close-up of the antenna. It is made from a piece of 0.0025" Nichrome wire glued in a hole drilled with a #85 bit (the smallest bit I own). The antenna is pretty close to the thickness of a human hair.
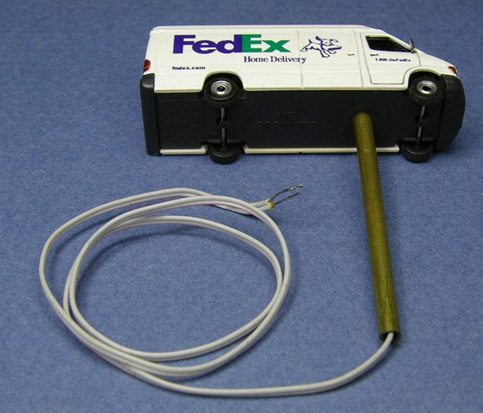
18. To attach the model onto the layout (and to make sure it doesn't get sucked up into a vacuum cleaner during one of the cleaning sessions) I will mount it permanently using a brass tube. The wires to power the LEDs are routed inside the brass tube which is glued into a hole in the underbody. I will then drill a hole in the layout's roadway, and glue the brass tube into the hole. That way the model will be solidly attached to the layout. The visible part of the tube will be painted flat black. The tube should pretty much be invisible under the vehicle.
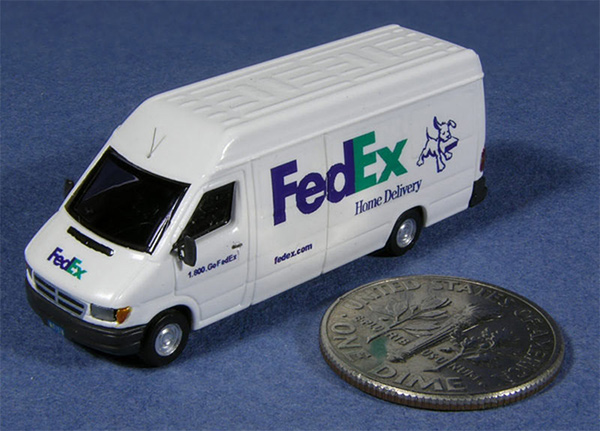
19. And finally, the obligatory giant-coin photo. This was a fun project and I am happy with the way it came out. So far I've built two models, and I have parts for making more! - Peter Wisniewski
See Photo Gallery 2 for additional photos of the finished model
Contact: [email protected]