Awesome ‘N’ Amazing
Project to build the Knox Chemical Fire Engine
from the Micron Art kit
Building a Knox Chemical Fire Engine by Peter Wisniewski
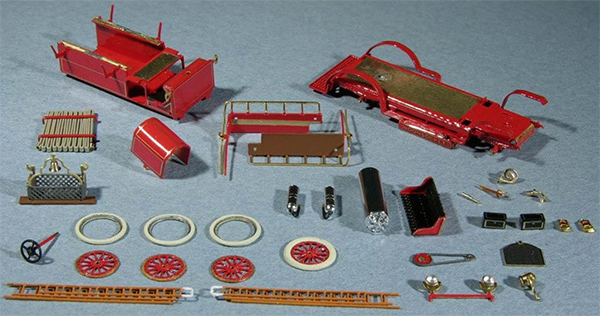
The Micron Art kit is photo etched brass, which means some of the parts appear to be rather 2-dimensional.
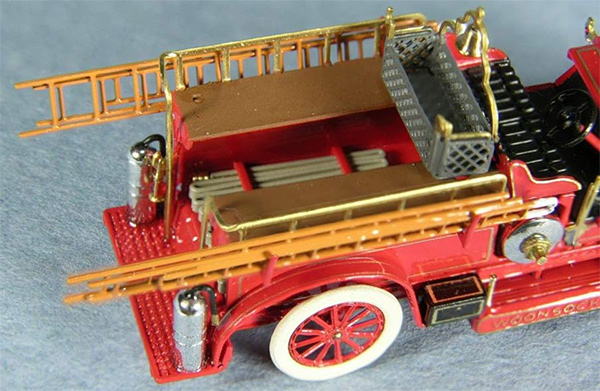
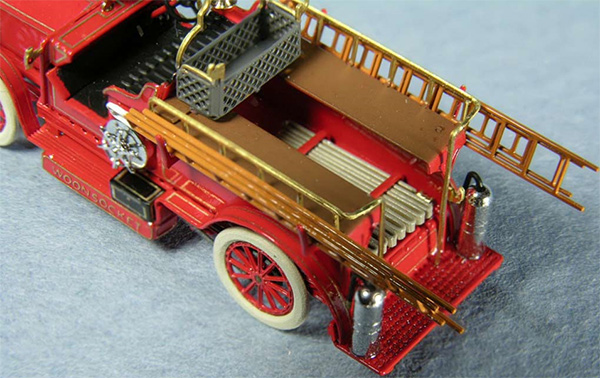
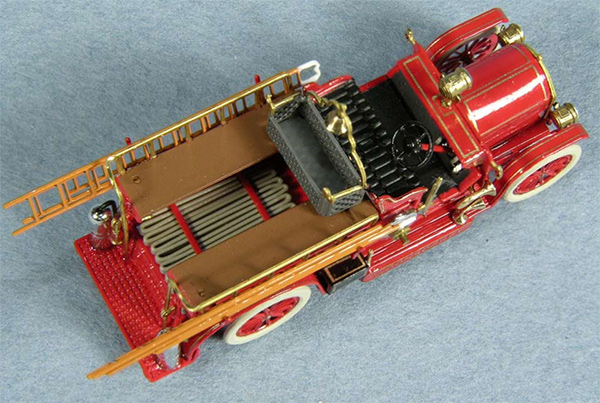
Since I own a Sherline lathe, I was able to replace some of the kit's flat pieces with a 3-dimensional parts. The bell, horn, siren and water nozzle were turned from a 1/16" brass rod. The nozzle was then attached to the right running board.
The fire extinguishers were turned from 0.060" styrene rod. I used a 0.010" brass wire (painted black, with a brass tip) for the extinguisher hoses.
The headlights were turned from a styrene rod. Then I glued a tiny slice of rectangular styrene on top of the headlights to simulate the vents. The headlights were then attached to the brass brackets using 0.006" brass wire. The reflectors are modified MV lenses. I ground and polished them to have flat faces.
I also drilled through the lanterns on the firewall and then filled the hole with a dab of clear red paint to simulate red lenses.
The kit's running board toolboxes had open ends, so I made new ones from couple of pieces of a 0.060" square styrene stock painted black.
I replaced the photo etched folded hose with a piece of 0.010" X 0.030" flat brass wire which I folded to make it look like a hose. I also made hose couplings from small slices of thin-wall brass tubing shaped using a Dremel tool and a file.
I drilled a hole in the floor to accept a new steering shaft made from a piece of brass tube. That provided a solid attachment point for the steering wheel shaft. I also drilled out three additional holes in the floor for pedals made from flattened 0.008" stainless steel wire.
The kit was assembled by soldering some of the major components and also using 5-minute epoxy for the remaining assemblies.
Tire halves were soldered together and the inside and outside edges were filed round to look more like real tires. The wheels would not properly seat in the tires so I ended up enlarging the tire's inside diameter using a rat-tail file. Tires were painted Floquil Antique White as most tires from that period were natural rubber.
The majority of painting was done using Scalecoat II AT&SF red paint over Tamiya metal primer. I also used Scalecoat II loco black. Headlights were painted using Alclad II Pale Gold. Extinguishers and chemical tank were painted with Alclad II Chrome over gloss black. Fire hose, benches and ladders were painted with various Floquil and Testors paints.
The pin-striping was done using custom waterslide decals. I designed and printed them on an Alps printer which is capable of printing gold. Decals were then applied to the sub-assemblies and clear coated.
This is a well designed kit which was a pleasure to build. It was built over a period of about 6 months but this was one of several projects I was working on, so it didn't actually take 6 months to build. - Peter Wisniewski
The model is also featured on http://micronart.com/Wisniewski.html
All of the brass parts from the photo etched kit, as well as any of the parts turned on the Sherline lathe that required painting, were pre-painted prior to assembly.
The fire hose made from 0.010" X 0.030" flat brass wire.

The foot pedals made from flattened 0.008" stainless steel wire.
The fire extinguishers were turned from 0.060" styrene rod, and 0.010" brass wire painted black with a brass tip was used for the hose.
See Photo Gallery 2 for additional photos of the finished model
Contact: [email protected]